


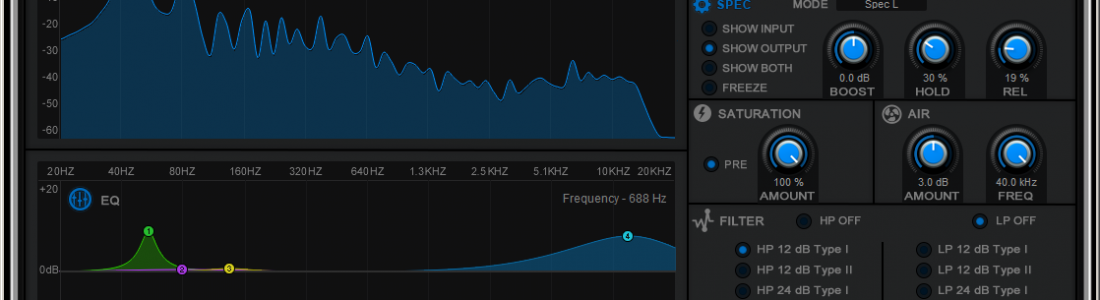
Like most EQ plug-ins it features a number of bands with variable Q, level and frequency. The RP-EQ has 8 bands. Each band has it’s own colour for easy navigation. Bands can be turned on and off independently. Changing the level and frequency of a certain band can be done with knobs. For precise adjustment of the knobs you can use the shift button when clicking and moving the mouse. You can also grab one of the numbered dots in the graphical screen and just move them with your mouse. When using a software EQ for mastering I always like to work with the graphical screen. This works easy and fast. But the downside is that when you want to make changes to the level of a certain band using the graphical screen the frequency always changes a bit while raising or lowering the gain with the mouse. A smart feature on this EQ is that the frequencies can be locked. A nice feature for controlling the frequency is the ability to use the note values instead of the frequency value. For instance in this way it is more easy to lower or raise the level of a C2 note by just turning the frequency knob of one of the 8 bands until its says C2.
The RP-EQ also supports mid/side EQ-ing. You can switch the mode of the EQ with the blue fader icon in the top left corner from EQ to mid/side. You can also use this button to turn off this part of the EQ. In mid/side mode bands 1-4 are used for the mid signal, and band 5-8 for the side signal. The mid-side function can be a very useful too for both the producer and the mastering engineer.
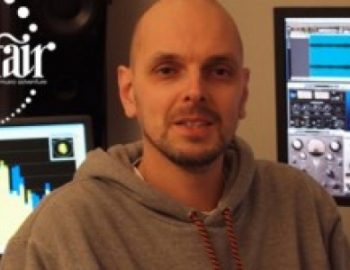
As a mastering engineer I am always looking for new mastering tools. Sometimes you find those tools in places where you least expect them. A few weeks ago I met Rob Papen at the Dancefair. He told me he had developed a new tool that might interest me. Rob Papen is well known by music producers for his award winning virtual synthesizers and FX plug-ins. And maybe some of you also remember him from his number 1 hit “Nova – Aurora” from 1981. A funny side note is that this actually was my first 7″ single I bought when I was a child. I think it’s great that people who are musicians from origin design tools for music production. They can design tools from a musicians perspective.
Rob and his team have developed an equalizer plug-in. The plug-in is called RP-EQ and is part of the eXplorer-III bundle. But the RP-EQ is also sold separately. There are a lot of EQ plug-ins available these days. But this one differs from its competitors by offering some extra features rarely seen on an equalizer plug-in. The base for this plug-in was formed by the EQ of the RAW synth. Rob was curious how this EQ would sound on its own. So he developed a stand alone version of the EQ and the result was very good. So he decided to make some changes to the original design to improve the performance even more. But it’s much more than just an improved stand alone version of the RAW synth EQ. This plug-in was intended to use on a channel strip or the master channel of your DAW. So you can use it both for mastering and producing.
The EQ:

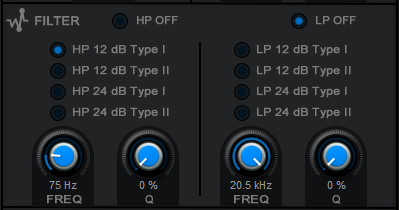
The 8 bands of the equalizer have no low pass or high pass filter options. For this purpose 2 separate filters are present. At first I did not like the idea that I could not change the 8 bands to low pass or high pass mode. But when giving it some more thought it’s not a big problem. You are not going to use more than one low pass or high pass filter at the same time anyway. Also by having these 2 separate filters you still have the 8 EQ’s available for other corrections. It is nice that you can choose between a slope of 12dB or 24dB per octave. There are two filter types. Type I and Type II. I like the sound of Type I better but that’s just my opinion. Also type II added distortion to the sound when I was testing it on a finalized song and cutting off all the frequencies above the 500 Hz. The distortion was still present when lowering the input level. So the distortion is not level dependent. This could however give a nice effect when using the EQ for EQ-ing a synth when you want to make the sound a little bit more dirty.
But for mastering I would advise to always use Type I to make sure no extra distortion is introduced.
Dancefair is an educational event for DJ’s and music producers. 6000 [...]
A lot of times customers ask us how they can improve the sound quality [...]

Stefano Montanaro aka Preacker is a young producer, 50% of team [...]